Install
For MSSP cluster admins. Covers cluster prerequisites, the soctalk-system chart install, and onboarding the first customer.
Cluster prerequisites
Install these once per K3s cluster before soctalk-system. SocTalk expects Kubernetes 1.30+ because the system chart installs a native ValidatingAdmissionPolicy guard for tenant namespace operations.
K3s with Cilium
# K3s with flannel + kube-proxy disabled (Cilium will replace).
curl -sfL https://get.k3s.io | INSTALL_K3S_EXEC=" \
  --flannel-backend=none \
  --disable-network-policy \
  --disable-kube-proxy \
  --disable=traefik \
" sh -

# Install Cilium.
helm repo add cilium https://helm.cilium.io/
helm install cilium cilium/cilium --version 1.15.x \
  --namespace kube-system \
  --set kubeProxyReplacement=true \
  --set k8sServiceHost=<node-ip> \
  --set k8sServicePort=6443 \
  --set hubble.relay.enabled=true \
  --set hubble.ui.enabled=true

# Verify.
cilium status
cert-manager
helm repo add jetstack https://charts.jetstack.io
helm install cert-manager jetstack/cert-manager \
  --namespace cert-manager --create-namespace \
  --version v1.14.x \
  --set installCRDs=true
Configure a ClusterIssuer appropriate for your environment (Let's Encrypt, internal CA, or self-signed for dev).
The default SocTalk values request a wildcard host for customer UIs (*.customers.your-mssp.example), and Let's Encrypt only issues wildcards over DNS-01. Use a DNS-01 solver with the provider that hosts your zone. Example for Cloudflare:
apiVersion: cert-manager.io/v1
kind: ClusterIssuer
metadata: { name: letsencrypt-prod }
spec:
  acme:
    server: https://acme-v02.api.letsencrypt.org/directory
    email: ops@your-mssp.example
    privateKeySecretRef: { name: letsencrypt-prod }
    solvers:
      - selector:
          dnsZones:
            - your-mssp.example
        dns01:
          cloudflare:
            email: ops@your-mssp.example
            apiTokenSecretRef:
              name: cloudflare-api-token
              key: api-token
cert-manager has solver recipes for Route 53, Cloud DNS, Azure DNS, RFC 2136, and others. Pick the one for your zone provider.
If you do not need wildcard customer hostnames (i.e., you enumerate customer hosts individually), you can use HTTP-01 with
solvers: [- http01: { ingress: { class: nginx } }]instead. Thesoctalk-systemvalues default toclassName: nginx; the ACME solver'singress.class(HTTP-01) or DNS provider must match the chart's ingress class. For Traefik, setclass: traefik.
Ingress controller
K3s does not ship Traefik with us (we disabled it above). Install your preferred ingress:
# Option A: Traefik v3
helm repo add traefik https://traefik.github.io/charts
helm install traefik traefik/traefik -n ingress-system --create-namespace

# Option B: ingress-nginx
helm repo add ingress-nginx https://kubernetes.github.io/ingress-nginx
helm install ingress-nginx ingress-nginx/ingress-nginx -n ingress-system --create-namespace
Label the ingress namespace for NetworkPolicy:
kubectl label namespace ingress-system managed-by=ingressAuthentication mode
Two modes, set via SOCTALK_AUTH_MODE. The default for new installs is internal: SocTalk owns login, sessions, and password storage, and the bootstrap Job seeds an initial admin into a Secret (see Run the bootstrap). The alternative is proxy, where you front SocTalk with OAuth2-Proxy (or Keycloak / Dex) so an upstream IdP handles login and forwards trusted identity headers. Pick proxy if you already operate central SSO.
Full details: Internal auth.
Optional: proxy mode (OIDC via OAuth2-Proxy)
Skip this section on an internal-mode install.
helm repo add oauth2-proxy https://oauth2-proxy.github.io/manifests
helm install oauth2-proxy oauth2-proxy/oauth2-proxy -n ingress-system -f oauth2-proxy-values.yaml
Minimal oauth2-proxy-values.yaml:
config:
  clientID: <your OIDC client ID>
  clientSecret: <your OIDC client secret>
  cookieSecret: <32-byte base64>
extraArgs:
  provider: oidc
  oidc-issuer-url: https://your-idp.example/
  upstream: static://202
  set-xauthrequest: true
  pass-authorization-header: true
  reverse-proxy: true
Configure your ingress to route /oauth2/* to OAuth2-Proxy and protect the SocTalk UIs with an auth-snippet. Example for ingress-nginx:
metadata:
  annotations:
    nginx.ingress.kubernetes.io/auth-url: "https://$host/oauth2/auth"
    nginx.ingress.kubernetes.io/auth-signin: "https://$host/oauth2/start?rd=$escaped_request_uri"
    nginx.ingress.kubernetes.io/auth-response-headers: X-Auth-Request-User, X-Auth-Request-Email, X-Auth-Request-Groups
Then set auth.mode: proxy in soctalk-system-values.yaml (see below).
StorageClass
Any dynamic provisioner works. For K3s default, local-path is pre-installed. For production, use Longhorn, Rook/Ceph, or a cloud-provider CSI. Ensure one is marked storageclass.kubernetes.io/is-default-class=true.
Install SocTalk
Prepare values
Create soctalk-system-values.yaml:
install:
  msspId: "<uuid>"         # generate: uuidgen | tr A-Z a-z
  msspName: "Your MSSP"
  installId: "<uuid>"
  installLabel: "pilot-prod"

image:
  registry: ghcr.io/gbrigandi
  tag: "0.1.0"

ingress:
  enabled: true
  className: nginx
  tls:
    issuerRef: letsencrypt-prod
    secretName: soctalk-tls
  hostnames:
    mssp: mssp.your-mssp.example
    customer: "*.customers.your-mssp.example"

# Authentication mode. Default is "internal"; flip to "proxy" if you
# completed the OAuth2-Proxy setup above. The oidc block below is only
# consulted in proxy mode.
auth:
  mode: internal              # set to "proxy" for OAuth2-Proxy installs

oidc:
  trustedHeaderUser: X-Auth-Request-User
  trustedHeaderEmail: X-Auth-Request-Email
  trustedProxyCIDRs:
    - 10.42.0.0/16   # your pod CIDR / ingress CIDR

postgres:
  enabled: true
  storage: { size: 20Gi }
Install
helm install soctalk-system oci://ghcr.io/gbrigandi/charts/soctalk-system \
  --version 0.1.0 \
  --namespace soctalk-system --create-namespace \
  -f soctalk-system-values.yaml
The chart's pre-install Job verifies cluster prerequisites and fails fast if any are missing.
Run migrations
Migrations need the soctalk_admin DB role, whose credentials are mounted only on the dedicated Alembic Job (not the long-running API pod). See Postgres RLS for the role separation.
A completed Job is not re-runnable: kubectl apply against an existing Job with the same name is a no-op. Delete the previous Job (if any) before rendering a new one, so each migration run produces a fresh Pod:
# Delete any previous Alembic Job. --ignore-not-found is safe on first install.
kubectl -n soctalk-system delete job soctalk-system-alembic-upgrade \
  --ignore-not-found

# Render the Job template for this release and apply.
helm template soctalk-system oci://ghcr.io/gbrigandi/charts/soctalk-system \
  --version 0.1.0 \
  --namespace soctalk-system \
  -f soctalk-system-values.yaml \
  --show-only templates/jobs/alembic-upgrade.yaml \
  | kubectl apply -n soctalk-system -f -

# Wait for it to finish, then read the log.
kubectl -n soctalk-system wait --for=condition=complete \
  job/soctalk-system-alembic-upgrade --timeout=10m
kubectl -n soctalk-system logs job/soctalk-system-alembic-upgrade
Alembic itself is idempotent (no-ops if the DB is already at head), so re-running on an unchanged install is safe. The delete-then-apply pattern is what allows a fresh Pod to spawn on each invocation.
Run the bootstrap
kubectl -n soctalk-system exec -it deploy/soctalk-system-api -- \
  python -m soctalk.core.provisioning.bootstrap
This seeds the Organization row. On an internal-mode install it also creates the initial platform_admin user and writes the credentials to the soctalk-system-bootstrap-admin Secret:
kubectl -n soctalk-system get secret soctalk-system-bootstrap-admin \
  -o jsonpath='{.data.email}' | base64 -d; echo
kubectl -n soctalk-system get secret soctalk-system-bootstrap-admin \
  -o jsonpath='{.data.password}' | base64 -d; echo
The credential is flagged must_change, so first sign-in forces you to set a new password. On a proxy-mode install the bootstrap skips password creation; your IdP provisions the first user on their first authenticated request.
Verify the install
# All soctalk-system pods Ready
kubectl -n soctalk-system get pods
# No cross-tenant traffic (Hubble)
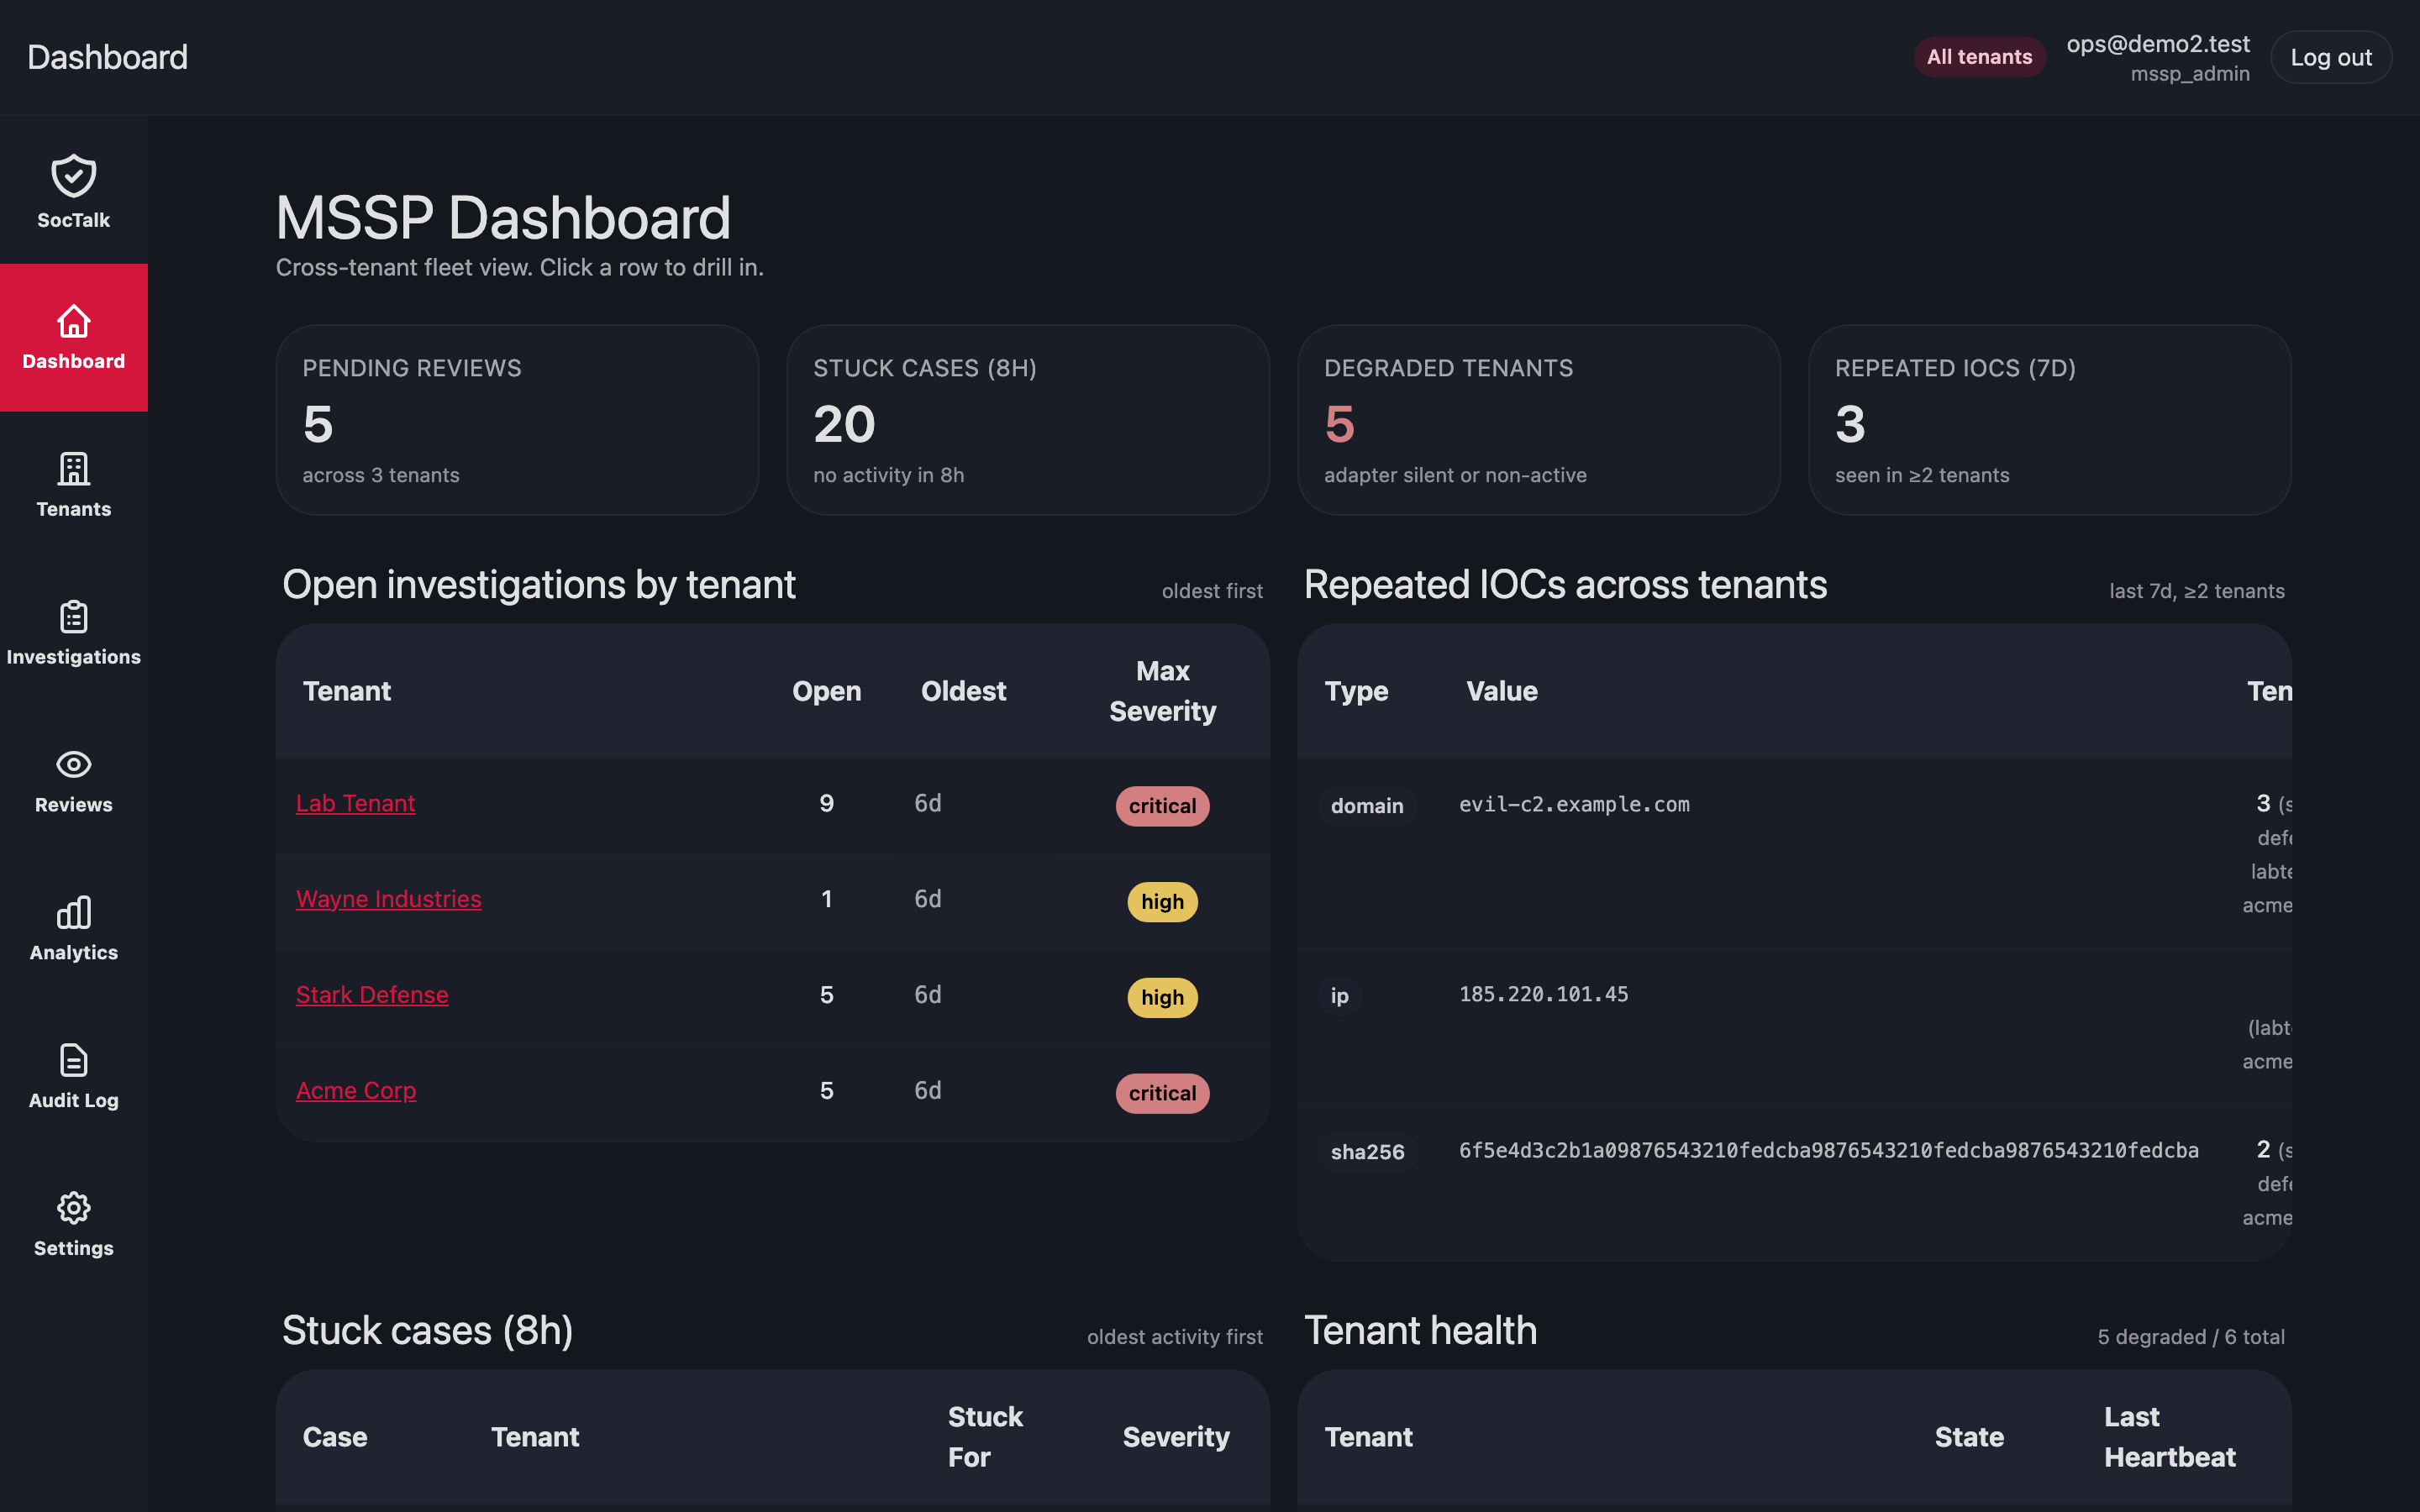
hubble observe --namespace soctalk-systemSign in at https://mssp.your-mssp.example with the bootstrap admin. You should land on the MSSP dashboard:
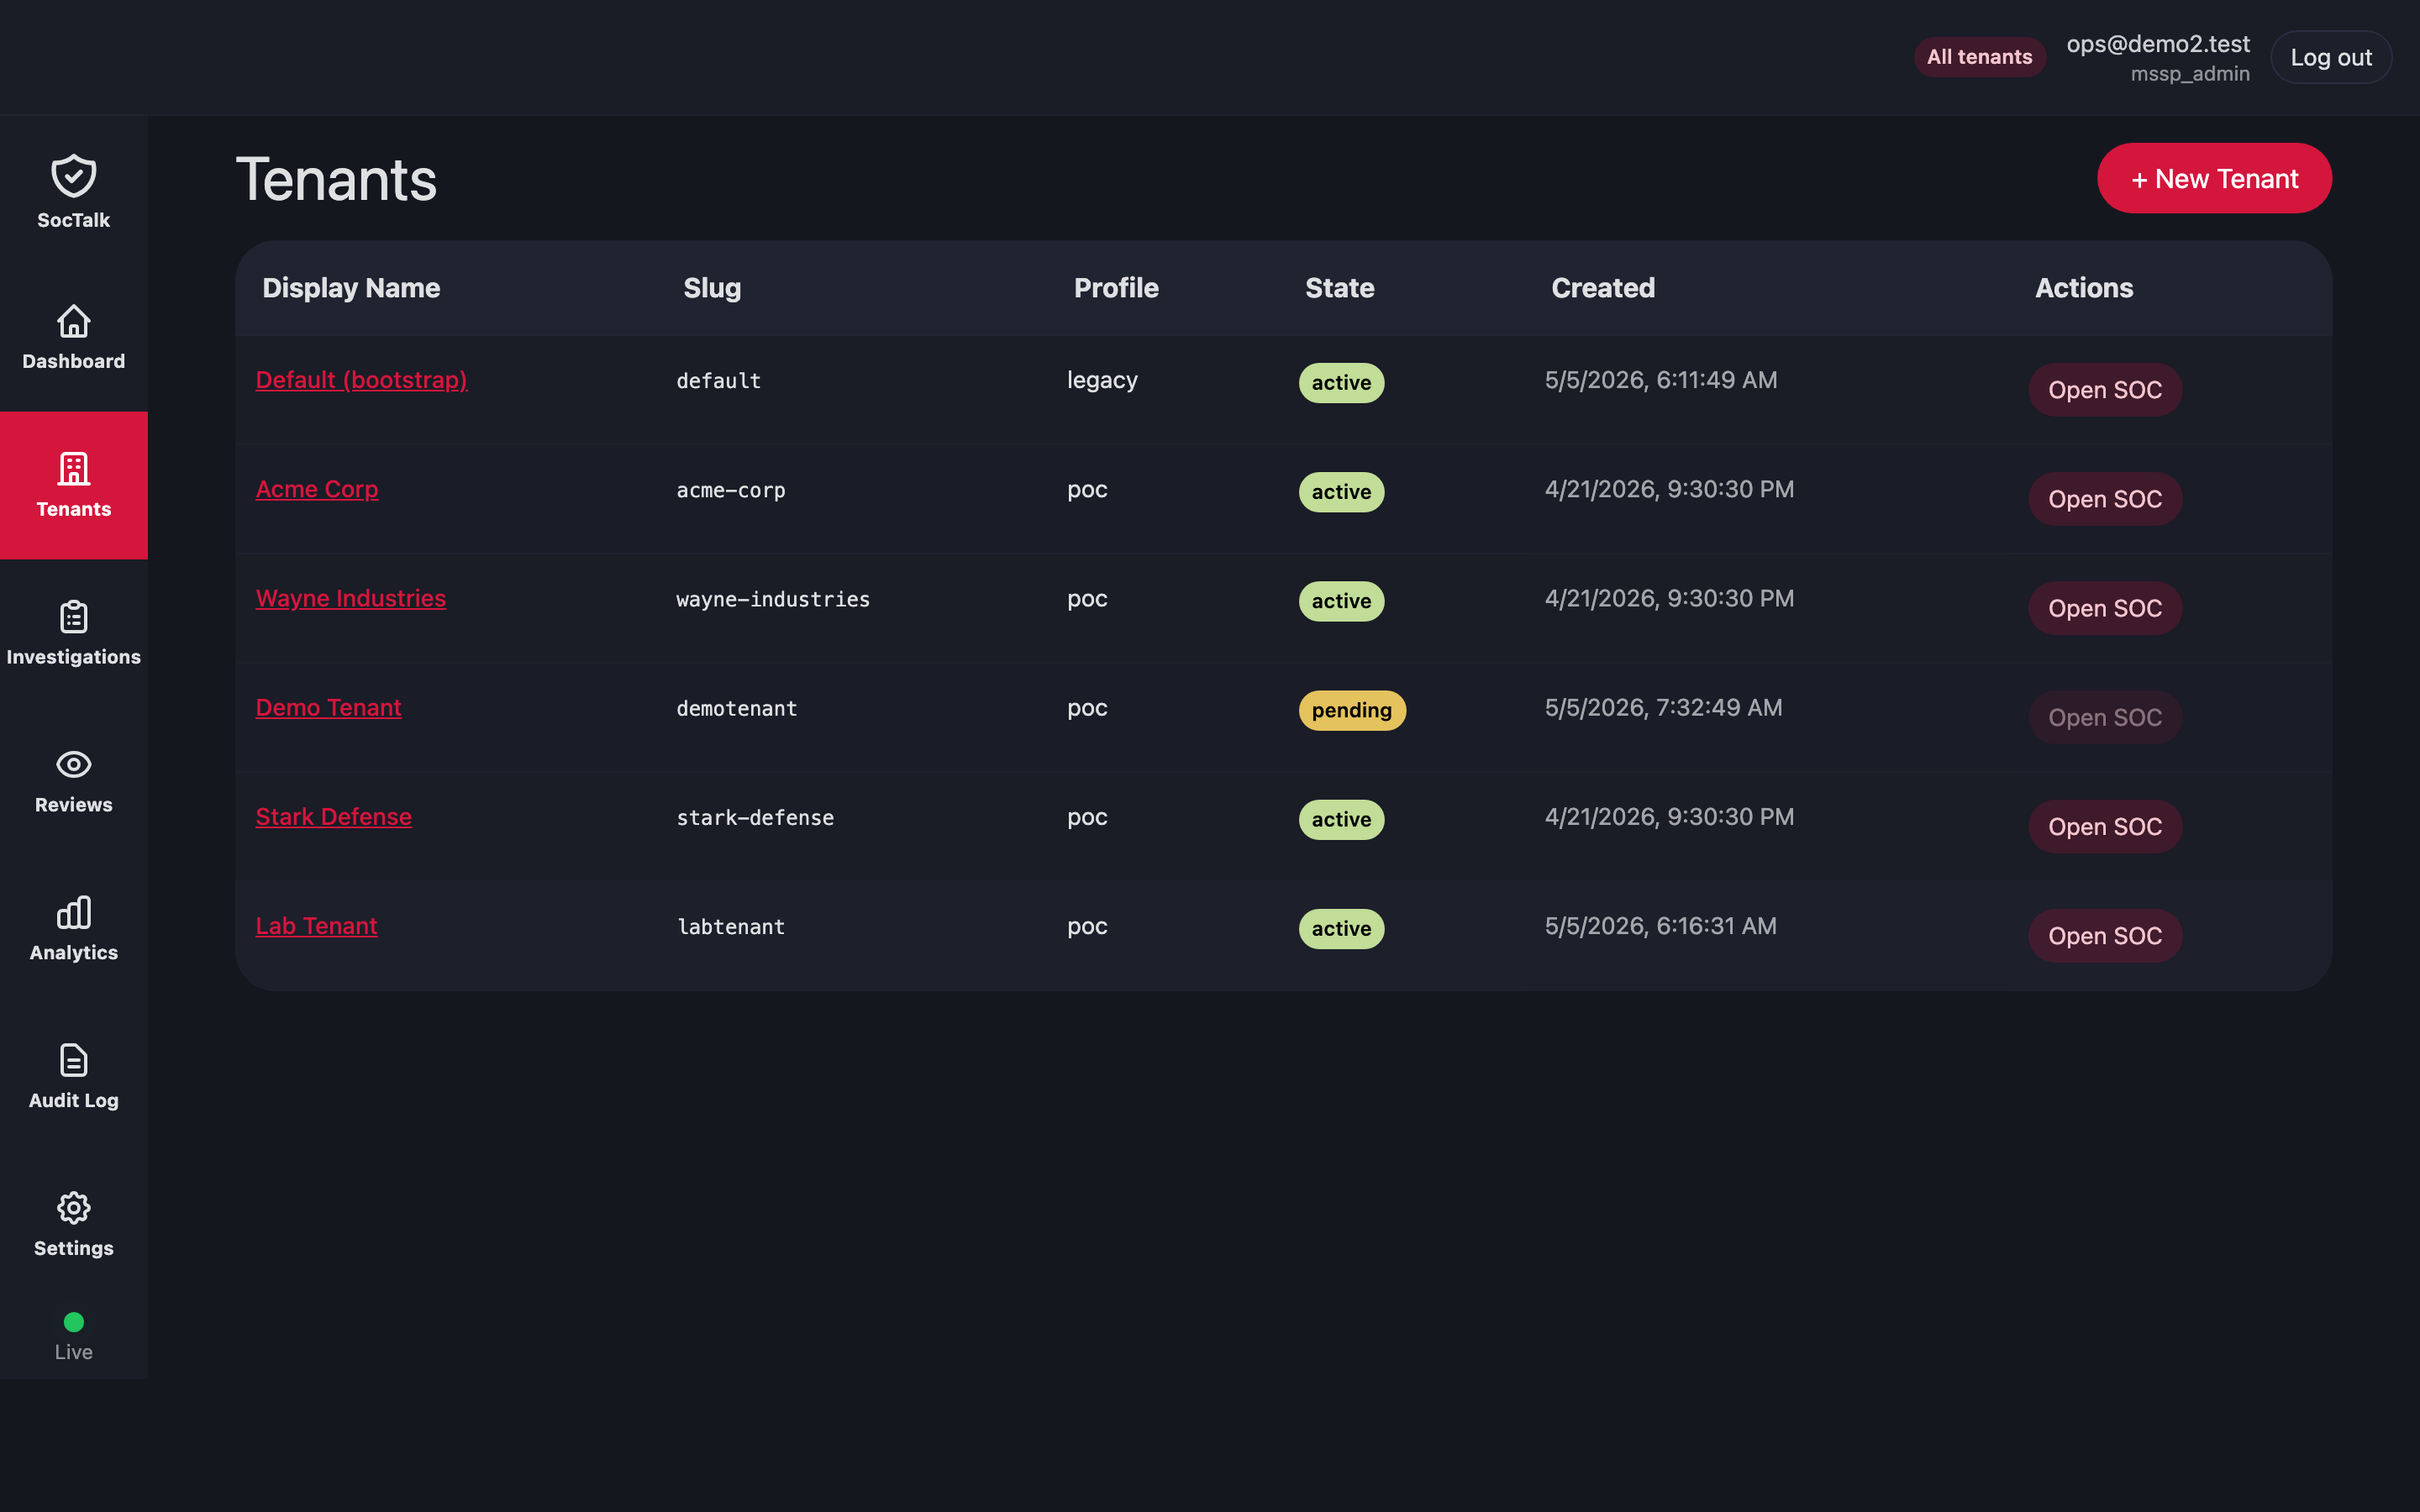
Onboard the first customer
In the MSSP UI go to Tenants → New tenant. The wizard collects identity, LLM config, integration URLs, and branding. Provisioning runs asynchronously; the detail page streams lifecycle events.
After the tenant reaches active:
- Update the tenant's LLM API key via Customer → Settings → LLM.
- Configure Wazuh agent ingress per Wazuh Ingress.
- Share the customer UI URL and initial
customer_viewerinvite with the end-customer.
Then verify:
# All soctalk-system pods Ready
kubectl -n soctalk-system get pods
# Tenant namespace exists and data plane is Ready
kubectl -n tenant-<slug> get pods
# No cross-tenant traffic (Hubble)
hubble observe --namespace tenant-<slug> --verdict DROPPED
Next
- Daily Operations for day-2 tasks.
- Upgrades for install-level and per-tenant upgrades.
- Wazuh Ingress for customer agent onboarding.